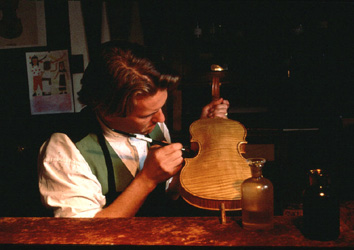
When preparing to make an instrument,
one must first of all consider one's choice of materials
and create a strategy of design. The rough flitches of
wood used for the front and back plates are glued
together with joints that must last perhaps for hundreds
of years. To shape the outline of the thin strips of maple called the
ribs, a mould is made which is later removed from the
structure. The front and back plates must be worked fairly thin to be able to
resonate easily, but because they must also support a lot of tension, they are
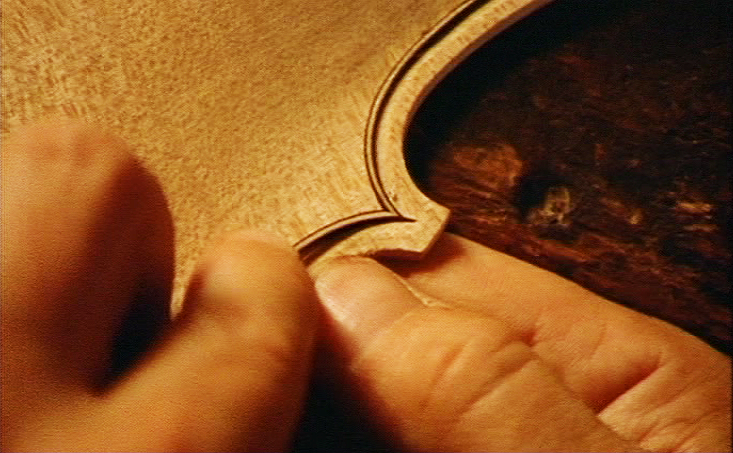
shaped into a very exact arching. The edges of the thin
plates are then reinforced by the inlaying of the purfling
which also serves the purpose of adding a visual effect. Once the outside arching
of the plates has been shaped, the hollowing of the inside
can begin. The graduation of the plates to the proper thickness along with the
cutting of the sound holes and fitting and glueing the bassbar
are really the most difficult aspects of violin making. No two pieces of wood
have the same properties and must therefore be worked differently every time.
The carving of a scroll on the end of the neck of as stringed
instrument has a long tradition and probably has symbolic archetypal significance.
After the finished instrument has been coated in a glorious veil of tinted varnish,
it can be adjusted tonally by means of the sound post
and other aspects of the final fitting up.
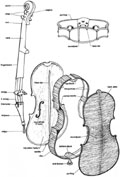
violin exploded view
Here are some very useful measurements of violin family instruments.
Please let me know if you come across any mistakes or have suggestions on adding
to or improving this list.
The Violin, The
Viola, The Cello and The
Bass
MATERIALS
 The
woods traditionally employed for the construction of the violin family instruments
are maple or sycamore
for the back, ribs and neck, and generally spruce for the belly. The variety
of maple used most generally is the Acer Pseudoplatanus and Acer Platanoides.
The maples are medium sized trees with long-stalked, palmately lobed leaves,
small regular flowers and a characteristic winged fruit called a "samara" or
key, borne in pairs.
The
woods traditionally employed for the construction of the violin family instruments
are maple or sycamore
for the back, ribs and neck, and generally spruce for the belly. The variety
of maple used most generally is the Acer Pseudoplatanus and Acer Platanoides.
The maples are medium sized trees with long-stalked, palmately lobed leaves,
small regular flowers and a characteristic winged fruit called a "samara" or
key, borne in pairs.  The spruce used most often for stringed instrument fronts is the Picea
abies or the Picea excelsa, the common christmas tree, with its whorled
branches, narrow needlelike leaves which are borne on short peg like projections
of the stem. It is sometimes said that wood suitable for violins is that which
has grown at high altitudes and has had to suffer harsh conditions such as cold
weather and poor soil. While this might seem slightly myth oriented, it is nonetheless
true that wood which has grown too quickly in lush environments and rich soil,
generally tends to be less resonant and less able to withstand the stresses
it is subjected to in the finished state. It is also a well known fact that
air dried wood, seasoned for some years, without being kiln-dryed is far better
choice. This is especially true for musical instruments which are shaped to
a thin form and must bear the considerable tensions of the taut strings. Normally
8-10 years are considered necessary to season quality tone wood. If fresh wood
is used it will invariably distort, check and split. The violin maker bites
on his wood to try to tell whether it will be strong enough. He lets it fall
and listens for its ring. He will try to go by "feel."
The spruce used most often for stringed instrument fronts is the Picea
abies or the Picea excelsa, the common christmas tree, with its whorled
branches, narrow needlelike leaves which are borne on short peg like projections
of the stem. It is sometimes said that wood suitable for violins is that which
has grown at high altitudes and has had to suffer harsh conditions such as cold
weather and poor soil. While this might seem slightly myth oriented, it is nonetheless
true that wood which has grown too quickly in lush environments and rich soil,
generally tends to be less resonant and less able to withstand the stresses
it is subjected to in the finished state. It is also a well known fact that
air dried wood, seasoned for some years, without being kiln-dryed is far better
choice. This is especially true for musical instruments which are shaped to
a thin form and must bear the considerable tensions of the taut strings. Normally
8-10 years are considered necessary to season quality tone wood. If fresh wood
is used it will invariably distort, check and split. The violin maker bites
on his wood to try to tell whether it will be strong enough. He lets it fall
and listens for its ring. He will try to go by "feel."
One of the benefits of felling a tree by yourself is the knowledge
gained by going through the process of initially cutting and eventually seasoning
the material. In fact violin making has fortunately conserved the idea through
the centuries up until the present that thorough knowledge of the whole process
from the rudimentary steps including the preparation of all materials is the
key to a successful "feel" for the work as a whole. Even if you don't plan to
fell trees from scratch always it is certainly a valuable experience to do it
at least once or twice. Very important is to debark the wood as soon as possible
to prevent insect and fungus growth between the bark and the cambrium. A treatment
of the wood with borax solution is said to deter fungus which can cause staining
and discoloration in the wood. I have been told that an initial storing of the
trunk upright in the direction that the tree grew for some weeks is beneficial
(possibly to do with settlement of sap that is still trapped in the pores. Storing
the wood for the first few months is generally done outside under a simple shelter
as rain or moisture is not detrimental to the wood at this stage except for
the fact that a high moisture content attracts fungus growth and insects such
as woodworm. Speculation as to whether the great masters of the seventeenth and
eighteenth centuries treated their wood in some way will be ignored here and
the accepted belief that air dried wood which is left completely intact is the
best material to make healthy sound instruments of the future is correct. The
traditional species used are spruce for the front (picea abies,norway spruce-known
to violin makers as picea excelsa) and for the back, sides and neck, maple or
sycamore-that is acer pseudoplatanus.
There are generally two ways to cut flitches from the tree trunk
for violin family plates. One is radially from the core of the trunk and is
usually referred to as being "on the quarter", and the other is tangentially
on the perimeter and usually called "from the slab
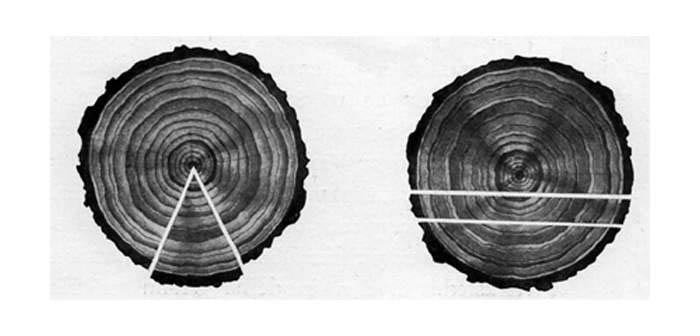
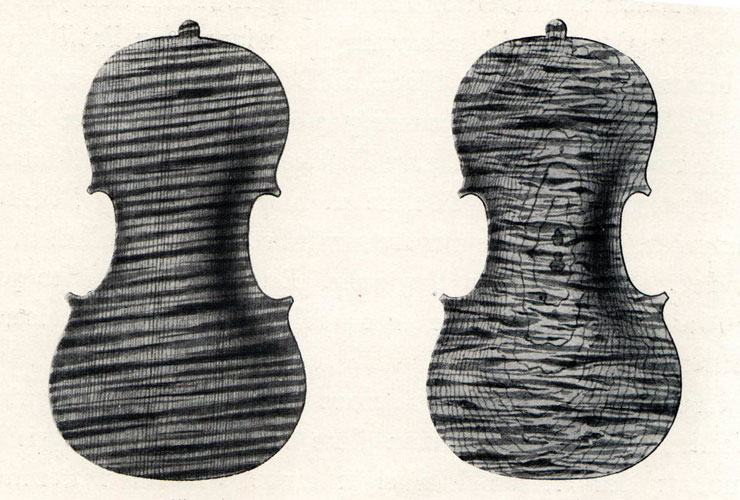
Quarter cut and slab cut respectively
back to top
 DESIGN/PROPORTION
Renaissance people believed Pythagoras' teaching that beauty was the result
of perfect number ratios. The shape of the instrument is designed to withstand
forces and direct them to a state of equilibrium, and the beauty of the curves
is a direct and unavoidable consequence of this. The design of the classical
instruments was of course influenced by renaissance thinking, where mathematics,
harmony and knowledge of aesthetics was fused from a variety of disciplines
including architecture, painting, astrology and music. In these times it was
quite common for a chemist to delve into music, philosophy and painting, and
a painter to study astrology and mathematics. There is strong evidence to support
the fact that the classical violin makers employed geometric construction involving
the influence of the early greek and roman theorists such as Pythagoras, Plato
and Vitruvius, although there seems to have been a fairly free execution of
these principles.
back to top
JOINTS/GLUEING
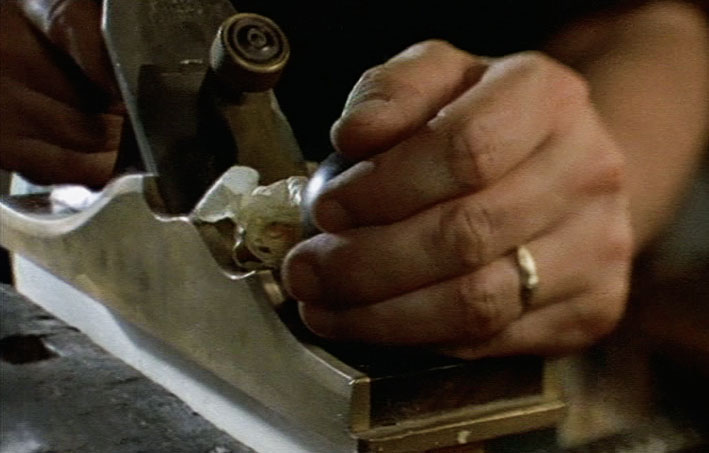
The glue used for all joints of the stringed instruments is traditional hide
glue made from converted collagen. Although it is a very strong glue, able to
hold wooden parts together with great force, the joints must be perfect. Hide
glue is not an adhesive that fills gaps, so the plane iron has to be honed to
a razor sharp edge and the joints planed with great precision. The main benefit
of hide glue in the construction of musical instruments is its reversibility.
Quite often instruments have to be repaired and restored, and hide glue will
always come apart without the danger of damage if the repair is properly done.
The use of synthetic glues such as PVC and the like to repair instruments has
done more damage than anything else. The joints on a violin include simple butt
joints such as the center joints of the plates and the complex joints of the
neck. It must be considered of prime importance to the health and longevity
of the instruments to have the joints in order.
It is thought that the early Egyptians may have been the first to extract
glue from pieces of skin with water. Traces of hide glue have been found holding
ancient artifacts together. In the early days of violin making, glue making
was a well founded tradition in many of the arts, although it was made by each
individual craftsman rather than by specialized manufacturers. Glue,like gelatin
is a product of the action of heat and water on collagen and can be extracted
from skin or bones. Hide glue is superior to bone glue and is generally used
for making violins.
The glue manufacturing process is basically the following:
*wash to remove dirt
* soak in lime water for 60-90 days
* wash to remove hair and lime
* neutralize with acid, drain, wash & drain
* add water, heat to 110-120 deg. F for 2-4 hours (called an extraction)
* drain off the dilute glue solution, evaporate, chill, dry, grind
* repeat last 2 steps 3-4 times to extract all of the glue with the temperature being increased 20-25 deg. F each time.
The process can lend itself to "home brewing" but it is messy and the aroma is found by some to be less than exciting! Your best bet is to buy the finished product from a reliable supplier.
CHEMICAL COMPOSITION
Hide glue is a protein derived from the simple hydrolysis of collagen which is a principal protein constituent of animal hides. Collagen, hide glue and gelatin are very closely related as to protein and chemical composition. An approximate chemical composition for glue is:
*Carbon 51-52%
* Hydrogen 6-7%
* Oxygen 24-25%
* Nitrogen 18-19%
* Total 100 %
The molecular weight of hide glue has a wide range from 20,000 - 250,000. The higher the gel strength, the higher the molecular weight.
Info courtesy of Eugene Thordahl of Bjorn Industries.
back to top
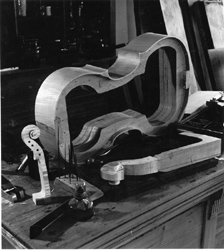
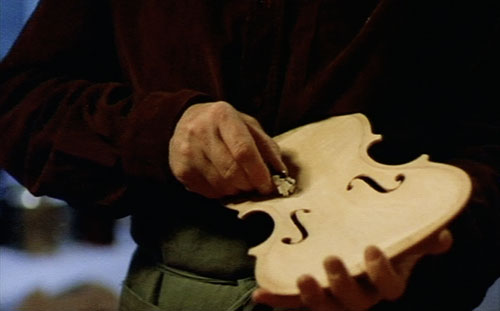
THE MOULD
There are two main traditions concerning the making of
the rib structure. On the one hand there is the italian method which involves
the making of a relatively thin inside mould which follows the inner contour
of the ribs themselves, and the so called french method which employs an
exterior mould, usually wide enough to accommodate the complete height of
the ribs. The six blocks are cut and fit into recesses
in the mould and then temporarily glued to the mould. When the blocks have
been shaped to the final contour of the ribs, the ribs are bent on a hot
iron and made to fit the shape of the mould and eventually glued permanently
to the blocks. When the two plates are finished, the ribs can be removed
from the mould and glued to the back or belly.
back to top
THE RIBS
 The
ribs are the 4-6 strips of maple or sycamore which make up the structure separating
the back and front of the violin. It has been said that they have a secondary vibrational function,
but contribute considerably to the transmission of vibrations between the back
and front of the instrument. Nowadays with the advent of modal analysis and a new understanding of vibrational behaviour, it is more rational to think of the sounding body as a whole and that the ribs are simply part of the body, contributing to the manner in which the instrument vibrates by their stiffness and mass. The ribs also define the volume of air inside the whole
structure, along with the interior shape of the plates. They are bent with
heat and humidity to conform to the shape of the mould. There are two principal
types of mould for the making of the ribs: 1.The interior or italian mould, and:
2. The exterior or french mould. The ribs are occasionally also built without
a mould on a flat wooden plate or on the back itself.
The
ribs are the 4-6 strips of maple or sycamore which make up the structure separating
the back and front of the violin. It has been said that they have a secondary vibrational function,
but contribute considerably to the transmission of vibrations between the back
and front of the instrument. Nowadays with the advent of modal analysis and a new understanding of vibrational behaviour, it is more rational to think of the sounding body as a whole and that the ribs are simply part of the body, contributing to the manner in which the instrument vibrates by their stiffness and mass. The ribs also define the volume of air inside the whole
structure, along with the interior shape of the plates. They are bent with
heat and humidity to conform to the shape of the mould. There are two principal
types of mould for the making of the ribs: 1.The interior or italian mould, and:
2. The exterior or french mould. The ribs are occasionally also built without
a mould on a flat wooden plate or on the back itself.
The ribs are glued to the six blocks which remain as a structural reinforcement
on the interior of the instrument. As the surface of the ribs facing the plates
is not large enough to form a good joint, 12 linings made of spruce or willow
are fitted and glued to the inside of the rib facing the plate. The linings
add strength to the whole rib structure, and consequently affect the vibrational behaviour of the whole corpus by stiffness and mass.
back to top
ARCHING
The exterior contour or arch of the back and front of a violin are carved to
the shape using gouges planes and scrapers. The shape of the arching is made
to give the thin plate of wood enough resistance to the lateral push of the
strings and to distribute that push evenly over the plate. There are many variations
possible for the shape and height of the arching. High and full, low and flat,
scooped etc. each particular arch shape forcing the plate to vibrate in subtly
different modes. The arch is also a feature of the aesthetic whole of the instrument
which determines a makers style.

back to top
THE PURFLING
The purfling or inlay which is traditionally incrusted into the edge of violins
and various other stringed instruments has a twofold function. Most importantly
perhaps, it protects the thin, fragile edges from continual wear through years
of constant use and damage. Because it is inlayed to approximately half the
thickness of the edge it prevents the further continuation of cracks that often
begin at the vulnerable end grain of the plates and tends to hinder the process
of edge wear due to contact with the fingers and hands of the player. Perhaps
equally important is the aesthetic function of the purfling. The contours of
the outline of the plates are enhanced by a visual trick, that makes the appearance
of the shape of the instrument more prominent. The total look of the outline
can be expressed in an infinite variation of modes by the proportions between
the relative thickness of the whites and blacks to one another and to the distance
from the edge.
back to top
HOLLOWING
 Making a
violin requires great patience, especially when it comes to the graduation of
the thicknesses, as each individual piece of wood has its own properties, being
a natural material. It takes a long time to shape and thin the wood, tapping
and flexing it until the maker is satisfied with the response of each piece.
When it comes to the hollowing of the plates the maker is confronted with one
of the more difficult aspects of the making of an instrument. One of the reasons
for the difficulty of mass producing violins is the fact that the wood never
has the same properties, even pieces of spruce or maple from the same tree.
When the flitches of wood are held and struck with a blow of the fist, some
pieces are found to vibrate loudly with a long ringing tone, whereas other pieces
sound dull and the note dies away quickly. Of course there are also qualitative
differences of the wood such as hard and heavy pieces which will require different
thicknesses in the end as opposed to light soft pieces.
Making a
violin requires great patience, especially when it comes to the graduation of
the thicknesses, as each individual piece of wood has its own properties, being
a natural material. It takes a long time to shape and thin the wood, tapping
and flexing it until the maker is satisfied with the response of each piece.
When it comes to the hollowing of the plates the maker is confronted with one
of the more difficult aspects of the making of an instrument. One of the reasons
for the difficulty of mass producing violins is the fact that the wood never
has the same properties, even pieces of spruce or maple from the same tree.
When the flitches of wood are held and struck with a blow of the fist, some
pieces are found to vibrate loudly with a long ringing tone, whereas other pieces
sound dull and the note dies away quickly. Of course there are also qualitative
differences of the wood such as hard and heavy pieces which will require different
thicknesses in the end as opposed to light soft pieces.
back to top
SOUND HOLES
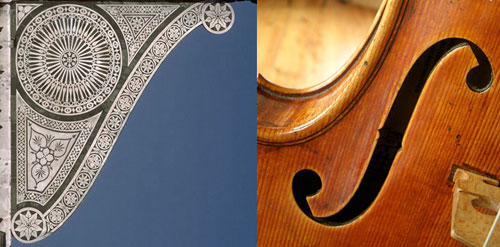
The aesthetics of shape is inspired by 18th c.contemporary architecture
 The sound holes with
their curious shape, apparently ornamental, have a great influence on the timbre
of the instrument. Basically they communicate the volume of air inside the instrument
(which has its own modes of vibration) with the outside air which is the medium
in which the waves are carried from the instrument. The size or openness of
the holes influences to a large extent the frequency of the vibrating mass of
air within the instrument, and therefore the selective reinforcement of certain
notes. The holes also influence the flexibility of the front plate and consequently
affect its vibrational patterns. They are cut with a small fine saw and
then finished with a razor sharp fine pointed knife.
The sound holes with
their curious shape, apparently ornamental, have a great influence on the timbre
of the instrument. Basically they communicate the volume of air inside the instrument
(which has its own modes of vibration) with the outside air which is the medium
in which the waves are carried from the instrument. The size or openness of
the holes influences to a large extent the frequency of the vibrating mass of
air within the instrument, and therefore the selective reinforcement of certain
notes. The holes also influence the flexibility of the front plate and consequently
affect its vibrational patterns. They are cut with a small fine saw and
then finished with a razor sharp fine pointed knife.
back to top
BASS BAR
The bass bar is a length of spruce cut with the grain running in the same
direction as the belly, which is glued to the interior surface of the finished
plate. It lies lengthwise under the right foot of the bridge about 265 mm in
length. The bass bar must be fitted with great precision to the inside of the
plate, but opinions vary on whether it should be glued in with spring (tension).
The function of the bass bar is primarily to allow the right foot of the bridge
to displace a larger area of the front when amplifying the lower notes, since
the plate would flex in the immediate area of the bridge foot due to the comparative
thinness of the plate. The mode of vibration of the instrument at frequencies
below 600hz is decidedly asymmetrical, where the sound post keeps the belly
relatively rigid on the left side of the instrument and allows the right side
of the bridge to effectively vibrate the bass side of the plate with fairly
large oscillations. A secondary function of the bar is to reinforce the belly
against the push of the strings. The shape of the bass bar determines the distribution
of the forces that act on it, and the height and weight of the bar influence
strongly the timbre of the instrument by determining the inherent resonance
of the most active vibrating part of the instrument, the belly.
back to top
SOUND POST
 The sound post is a cylindrical piece of spruce approximately 6 mm in diameter
in the violin, which is fitted to the interior of the instrument between the
back and front. The sound post is not glued in place but is held in position
by the innate tension in the instrument caused by the pull of the strings. The
main functions of the sound post are to reinforce the belly on the treble side,
to affect the vibrational behaviour of the plates and to counteract the forces
acting on the belly from the strings. The sound post is placed inside the instrument
with a sound post setter and gradually shaped to fit the inside surfaces. The
position of the sound post can affect the timbre of sound and the playability
of the instrument considerably, as can the tightness. The Italian name for the
sound post is "anima" or the "soul" because of its changeable influence on the
sound of an instrument.
The sound post is a cylindrical piece of spruce approximately 6 mm in diameter
in the violin, which is fitted to the interior of the instrument between the
back and front. The sound post is not glued in place but is held in position
by the innate tension in the instrument caused by the pull of the strings. The
main functions of the sound post are to reinforce the belly on the treble side,
to affect the vibrational behaviour of the plates and to counteract the forces
acting on the belly from the strings. The sound post is placed inside the instrument
with a sound post setter and gradually shaped to fit the inside surfaces. The
position of the sound post can affect the timbre of sound and the playability
of the instrument considerably, as can the tightness. The Italian name for the
sound post is "anima" or the "soul" because of its changeable influence on the
sound of an instrument.
back to top
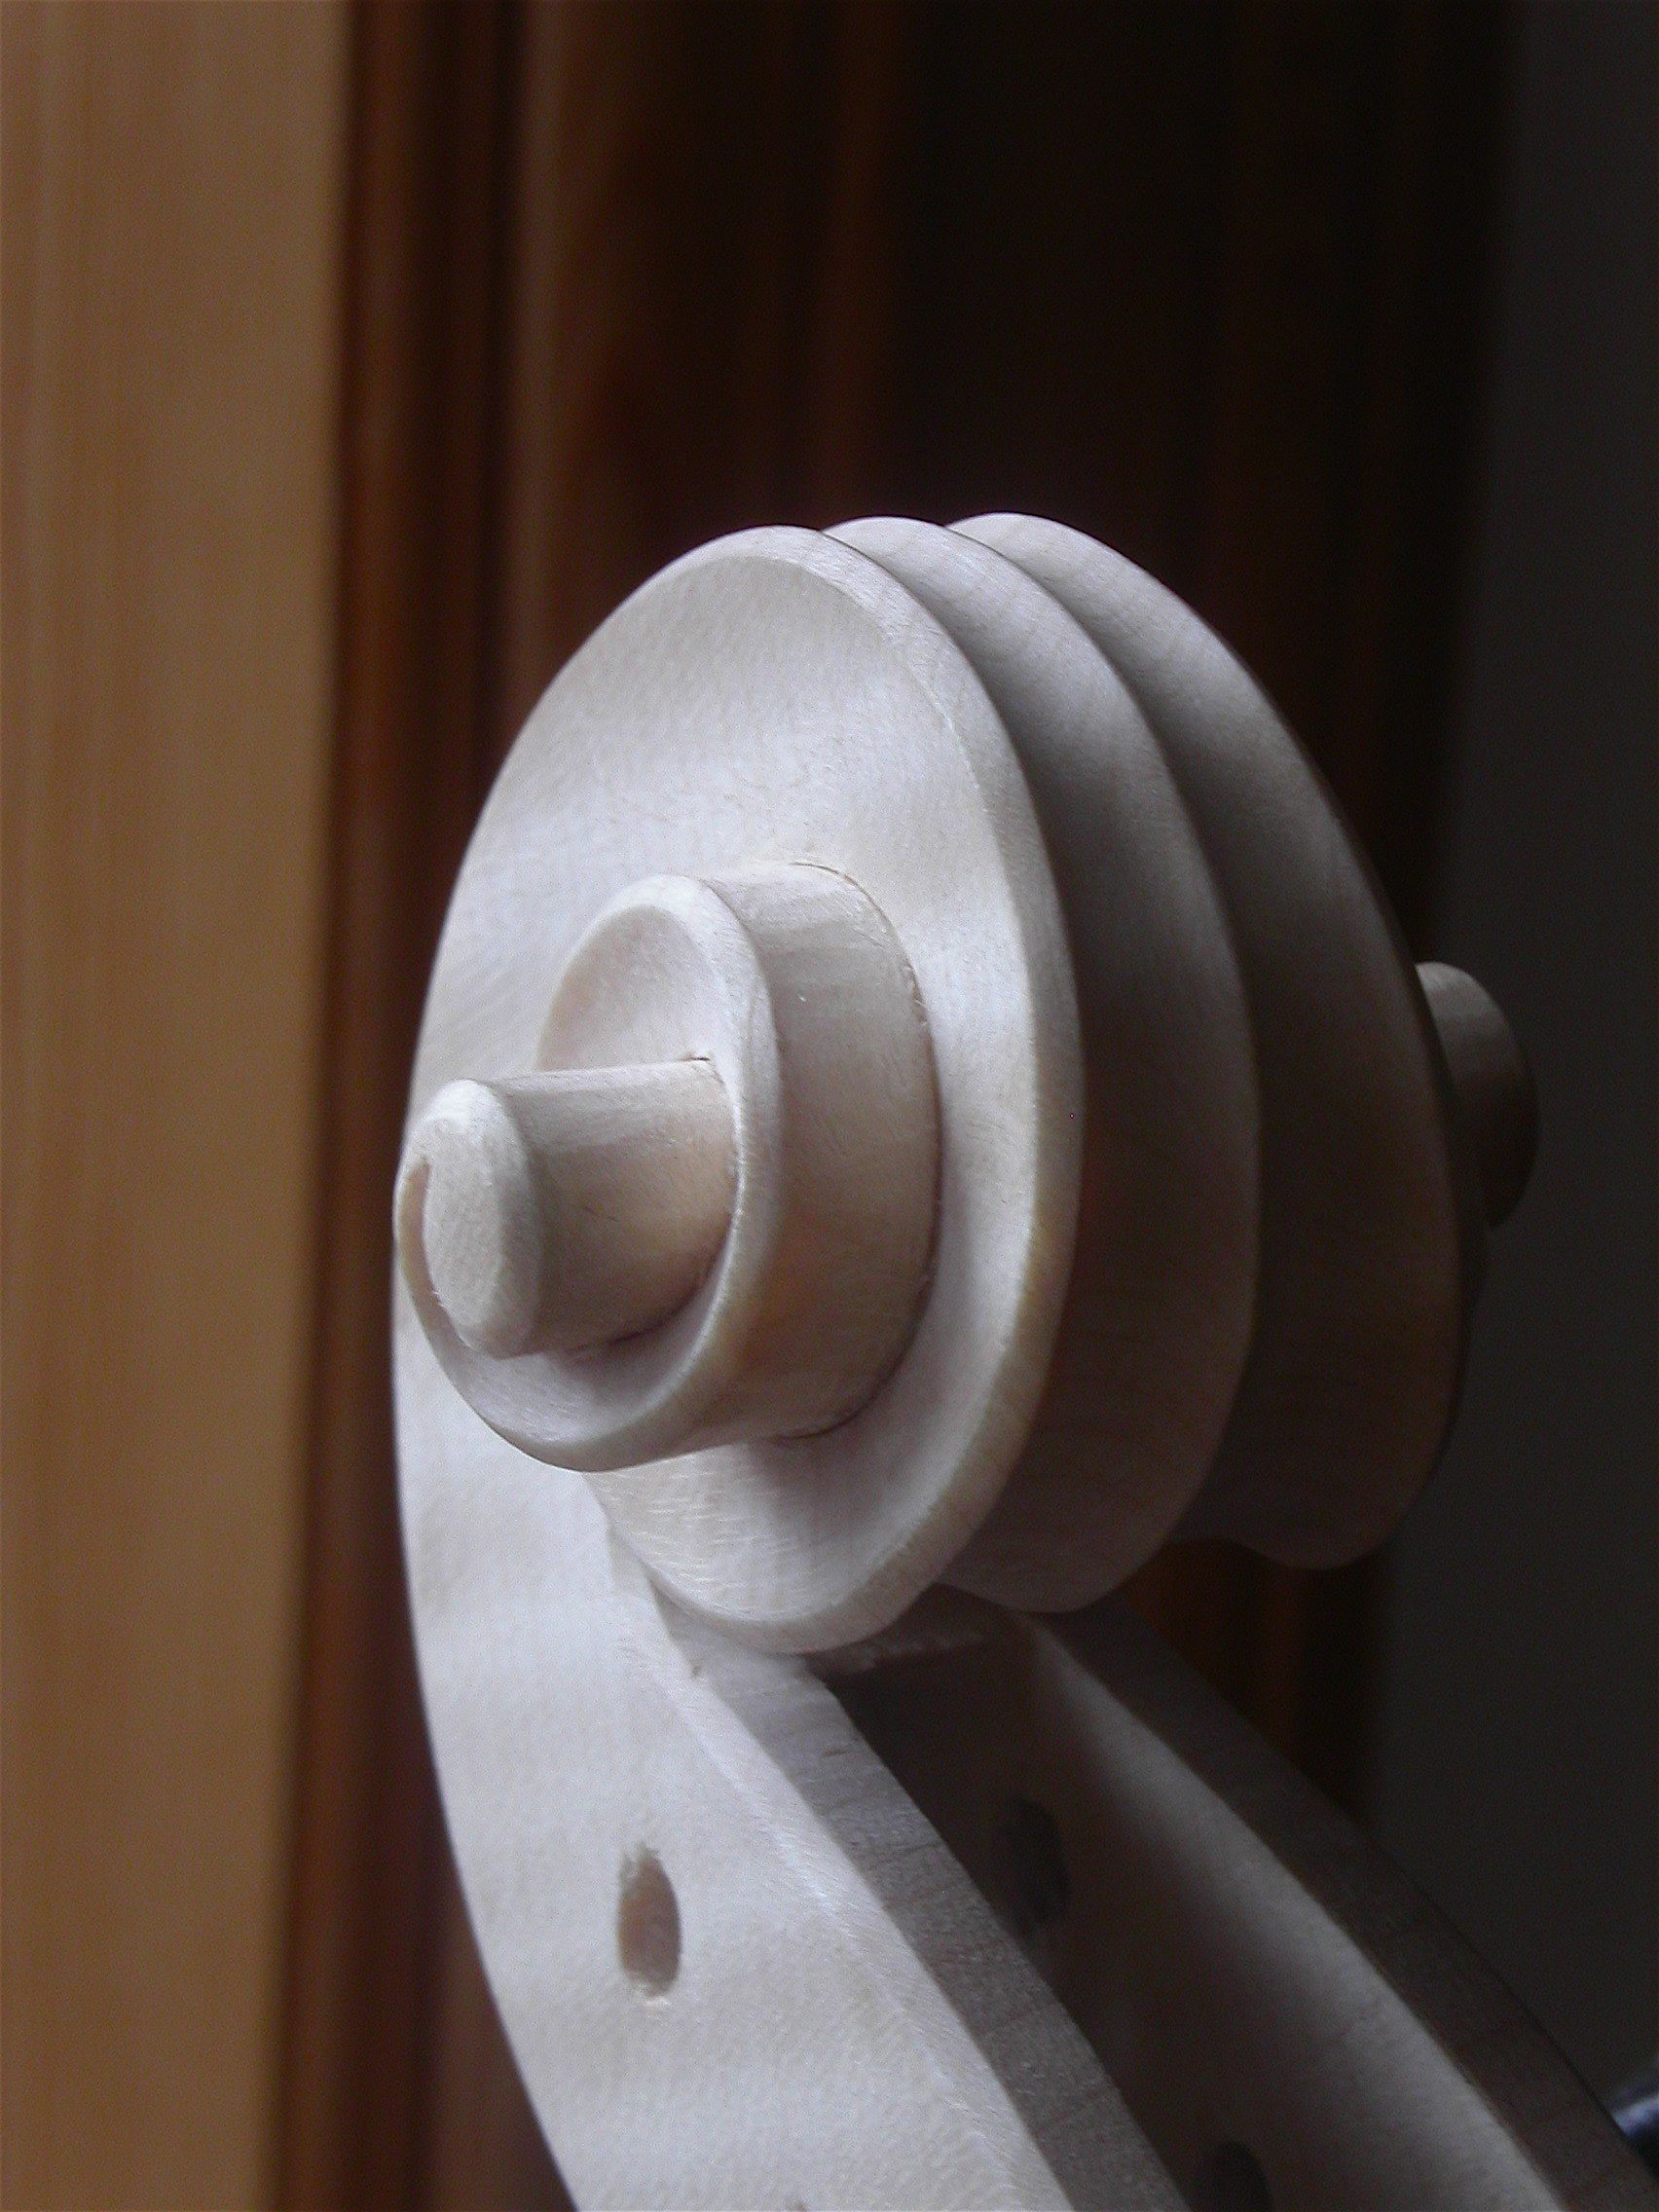
SCROLL
The scroll is the only part of the instrument which serves no real purpose,
except maybe to hang it up by, but as all parts of the instrument have a certain
mass and stiffness, they will inevitably contribute to the vibrational regime of the
corpus as a whole. It is however an important aesthetic addition
to the baroque concept of the violin family instruments. It is an important
part of the expression of the violin maker in terms of style and adds to the
visual whole of the instrument. The origins of the scroll are to be found in
the traditional schools of classical architecture, namely the spiral of Vignola
and the spiral of Archimedes.
back to top
 FITTING UP
The fitting up of the instrument includes many aspects but generally involves
the fitting of the sound post, fitting of the bridge, fitting and shaping of
the fingerboard, nut and saddle, and the shaping and fitting of the pegs. As
each sound post will have to be treated as a unique piece for every instrument
and player, so does the bridge have to be fitted and cut to match the musicians
personal tastes and the behaviour of the body of the instrument. It is up to
the skill of the maker to determine the ideal shape,cut and weight of the bridge
for each instrument.
back to top
VARNISH
 The varnishing
of a violin has two aims basically. One is to permeate the wood with a substance
which can protect it from dirt and sweat . Another aim is to cover the instrument
with a coloured sheath of varnish
proper which has a purely aesthetic function. The "ground" or substrata which
closes the wood can have a considerable influence on the behaviour of the sound
by affecting the stiffness of the plate. The coloured varnish sitting on top
of the ground, and wears off with time, is meant to enhance the appearance of
the wood, but can be detrimental to the freedom of vibration of the plates if
it is applied too thickly or has too hard a consistency. the varnish should
ideally be thin enough and light enough not to constrict the instrument. The
myths associated with varnishes never cease to inspire the imagination. The
"lost secret" of varnish making has a pleasing allure to many. The
varnish on many classical cremonese instruments is one of the great achievements
of violin making history. Whether it is possible or not to recreate exactly
the varnish of the classical masters is a subject laced with fierce debate.
It is interesting to note that the term "secret" in renaissance Italy didn't
have quite the meaning of the word today, the meaning having been more on the
lines of "knowledge" but nonetheless apprentices were on oath it seems, not to
divulge the knowledge they had gained in the workshop of their master to other
regions, and the oath if broken could have serious consequences.
The varnishing
of a violin has two aims basically. One is to permeate the wood with a substance
which can protect it from dirt and sweat . Another aim is to cover the instrument
with a coloured sheath of varnish
proper which has a purely aesthetic function. The "ground" or substrata which
closes the wood can have a considerable influence on the behaviour of the sound
by affecting the stiffness of the plate. The coloured varnish sitting on top
of the ground, and wears off with time, is meant to enhance the appearance of
the wood, but can be detrimental to the freedom of vibration of the plates if
it is applied too thickly or has too hard a consistency. the varnish should
ideally be thin enough and light enough not to constrict the instrument. The
myths associated with varnishes never cease to inspire the imagination. The
"lost secret" of varnish making has a pleasing allure to many. The
varnish on many classical cremonese instruments is one of the great achievements
of violin making history. Whether it is possible or not to recreate exactly
the varnish of the classical masters is a subject laced with fierce debate.
It is interesting to note that the term "secret" in renaissance Italy didn't
have quite the meaning of the word today, the meaning having been more on the
lines of "knowledge" but nonetheless apprentices were on oath it seems, not to
divulge the knowledge they had gained in the workshop of their master to other
regions, and the oath if broken could have serious consequences.
Click on the violin to see a beautiful example of a Stradivari varnish being
examined in the shop recently.
back to top

Made in RapidWeaver

